
With the rise of video conferencing, Zoom has become a household name and rightly so. The company has been pretty popular in its domain, but apart from that, general users didn’t have much idea about its existence. So if you are new to Zoom and want to learn about its installation process then you have landed at the right place. In this article, we bring you a step by step guide on how to install and use Zoom for video conferencing like a Pro. We have also mentioned some basic tips and tricks at the end so you get a fair idea about how to navigate Zoom for creating and joining a meeting. So without further delay, let’s go ahead and learn about the installation process.
Use Zoom for Video Conferencing like a Pro
1. There are two ways to use Zoom: through a web browser or a dedicated Zoom client. Generally, people use Zoom on a web browser because it’s fast and lightweight. However, you can install Zoom Client if you want more features. Here are the download links for major operating systems.
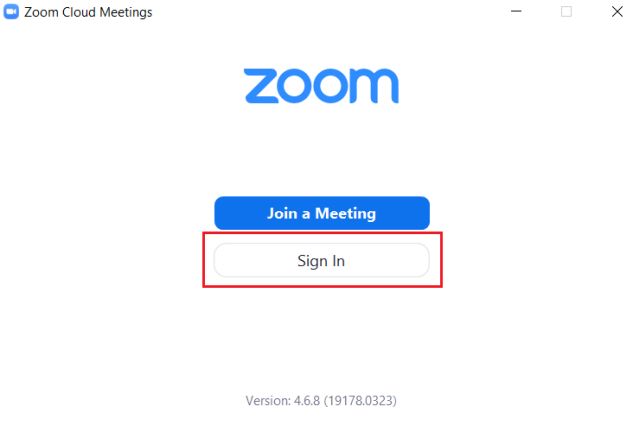
2. In this tutorial, I am installing Zoom on Windows to show you the whole setup process. After downloading the client from the above links, open it and click on the “Install” button. Next, click on the “Sign In” button.
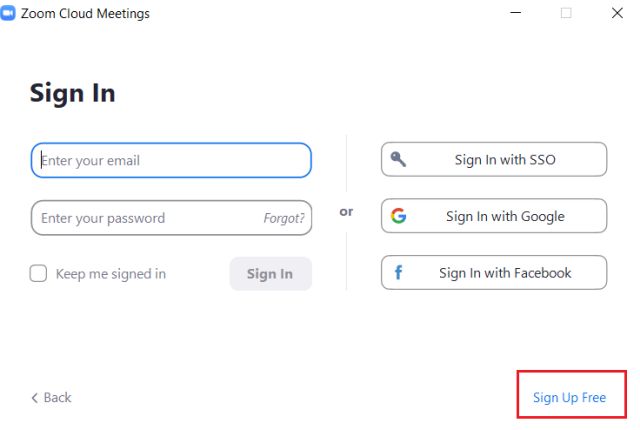
3. Here, click on “Sign Up Free” to create a Zoom account. You can also sign in with your Google or Facebook account, but I would recommend you to create a separate Zoom account for better privacy.
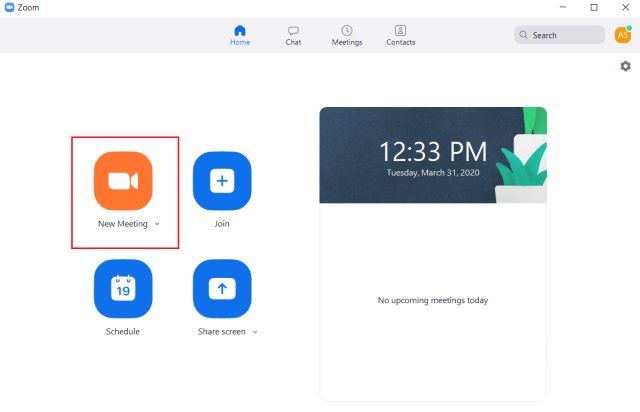
4. After you are done creating the account, you will be presented with the Zoom dashboard. From here, you can easily start a video conference by simply clicking on the “New Meeting” option.
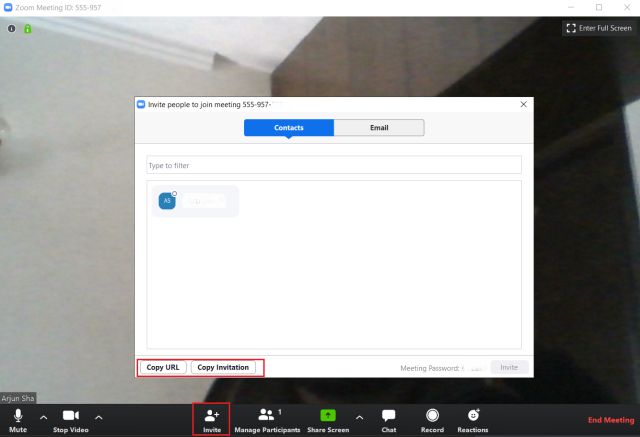
5. Instantly, you will be live and you can invite users by clicking on the “Invite” button. Here, copy the URL and share it with your teammates who are already on Zoom. However, if you want to invite someone who is not on Zoom then simply click on “Copy Invitation” and share it with the individual. It will have the Meeting ID and a password so the user can seamlessly authenticate and join the web conference through a web browser.
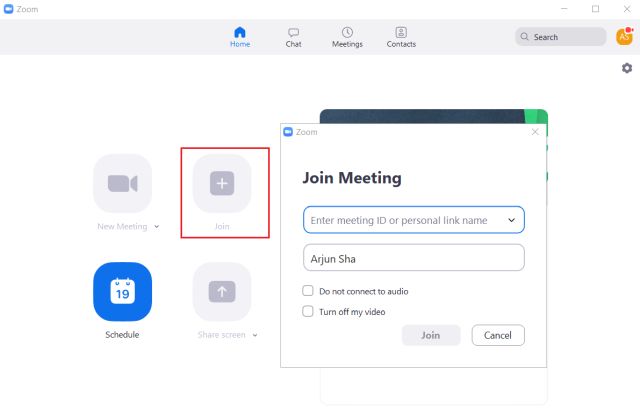
6. Similarly, you can join a meeting by clicking on the “Join” button. Here, enter the “Meeting ID” and you are in. If the host has not set a password for the meeting then it won’t ask for a password.
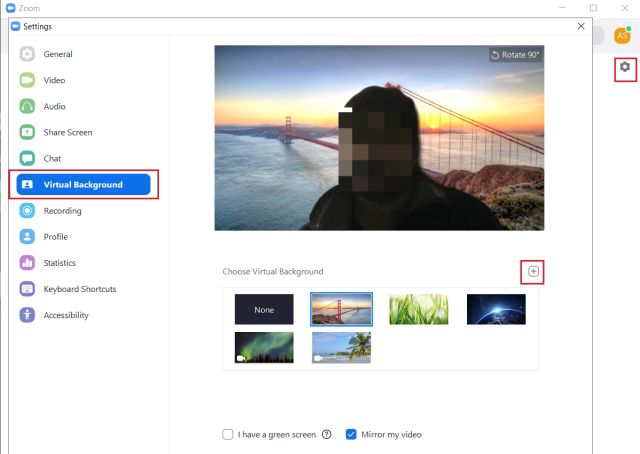
7. Those were the basic pointers about using Zoom. However, you must know a few tips and tricks so you can easily breeze through the app. For example, you can set a virtual background for video conferencing. Just click on the “cogwheel” icon and switch to the “Virtual Background” tab. Here, you can choose a background from the given options or add your own custom image or video.
8. In addition, you must know some keyboard shortcuts. Press “Alt + A” to quickly mute and unmute your audio. Next, press “Alt + S” to start and stop screen sharing. Further, press “Alt + Shift + T” to take a screenshot. Apart from these shortcuts, you must know how to quickly turn off/on your video in a web conference. Just press “Alt + V” and you are done.
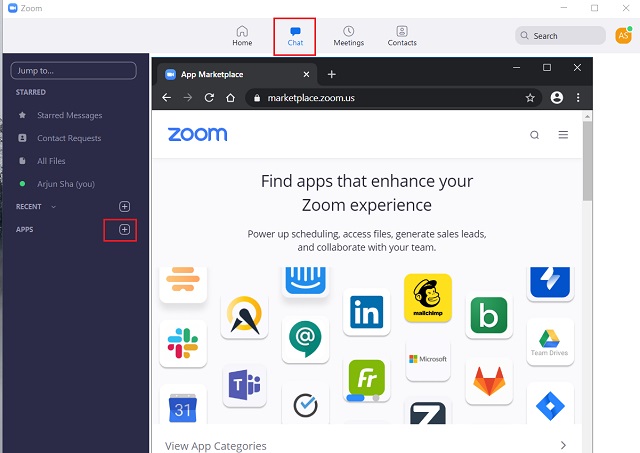
9. You can enable a lot of third-party plugins including Google Calendar, Office 365, Slack and more. Just switch to the “Chat” menu and click on the “+” button under the “Apps” menu. From here, you can seamlessly integrate your calendar schedules, notifications, office documents and more.
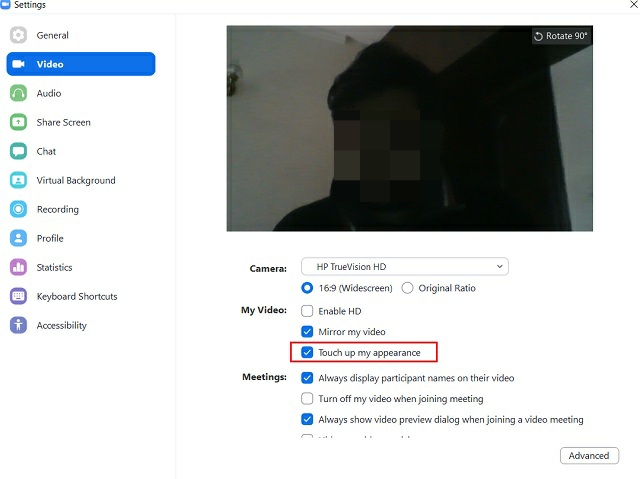
11. Zoom has a feature to enhance your appearance in live video and it works pretty well. Just open the Settings from the cogwheel icon and move to the “Video” tab. Here, enable “Touch up my appearance” and Zoom will soften your skin and also minimize blemishes from your face.
Install Zoom and Bring Life to Virtual World
So that is how you can install and set up Zoom on your computer and smartphone. In this tutorial, I have shown steps for Windows, but the steps are nearly identical for other platforms as well. If you are a heavy user of Zoom then I would suggest you to download the Zoom client for better controls and features. In case, you are disappointed with this app then you can take a look at Zoom alternatives. Anyway, that is all from us. If you are having any problem while installing Zoom then do let us know in the comment section below. We will definitely try to help you out.
Comments
Post a Comment